- Organise your routes using file-based routing.
- How to use the
expo-routerlibrary with theLinkcomponent anduseRouterhook.
- There are others routing solutions available, keep in mind we are using
expo-routerlibrary. - Expo Router is built on top of React Navigation, so you get the same navigation primitives with a file-based approach.
- TypeScript is fully supported and routes are automatically typed.
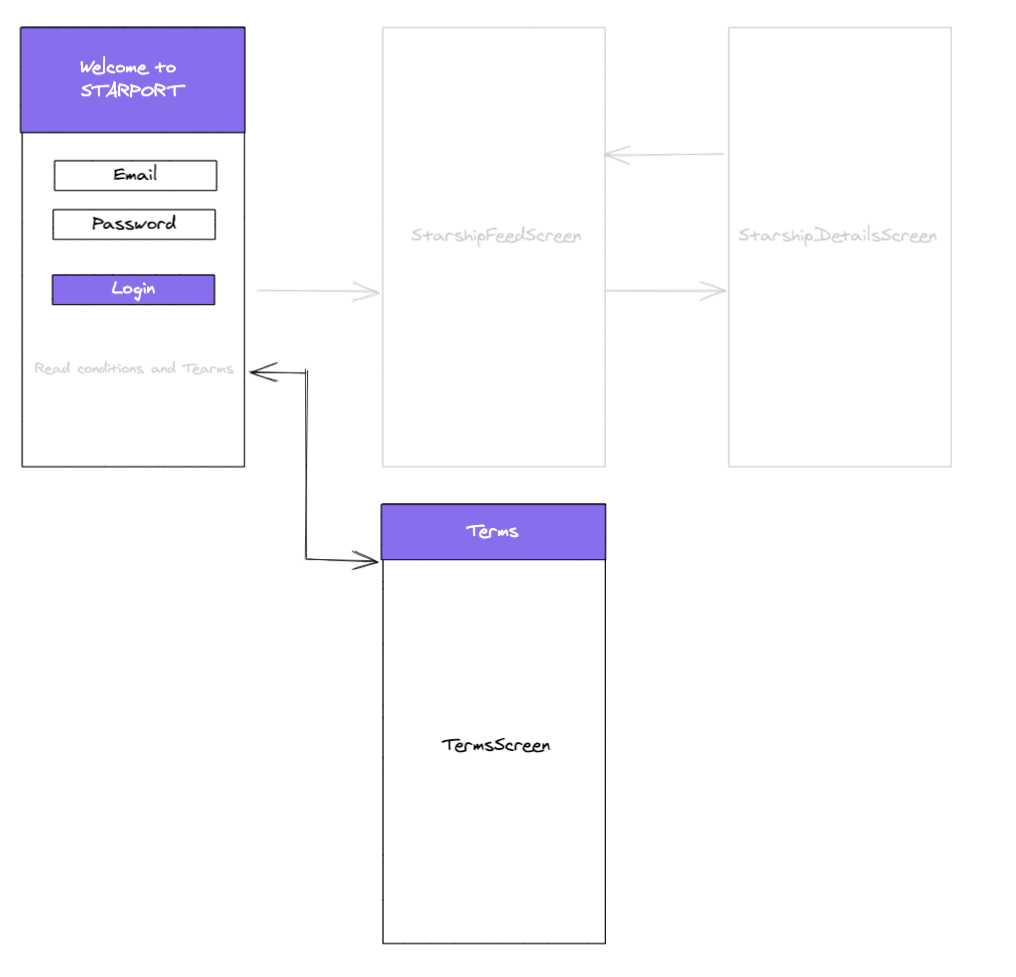
Here is a preview of our application user flow:

- Read the Getting started guide to:
- Install
expo-routerin your React Native project. - Configure the entry point in
package.jsonandapp.json.
- Install
🔭 Hint: With Expo Router, routes are automatically generated based on the file structure in the app/ directory.
- Create a new
app/directory at the root of your project. - Create an
app/_layout.tsxfile to define your root layout:
// app/_layout.tsx
import { Stack } from "expo-router";

export default function RootLayout() {
  return (
    <Stack screenOptions={{ headerShown: false }}>
      <Stack.Screen name="index" />
      <Stack.Screen name="terms" />
    </Stack>
  );
}- Create
app/index.tsxfor yourLoginScreen. - Create
app/terms.tsxfor yourTermsScreen.
🔭 Hint: In Expo Router, index.tsx is the default route (like index.html on the web).
Do you remember the <Text> "by login you accept the Terms and Conditions."? We will use the Link component or router.push() to go to another screen.
- Use the
Linkcomponent fromexpo-router:
import { Link } from "expo-router";

// Option 1: Using Link component (recommended)
<Link href="/terms">
  <Text>Terms and Conditions</Text>
</Link>

// Option 2: Using useRouter hook
import { useRouter } from "expo-router";

function LoginScreen() {
  const router = useRouter();

  function navigateToTerms() {
    router.push("/terms");
  }

  return (
    <TouchableOpacity onPress={navigateToTerms}>
      <Text>Terms and Conditions</Text>
    </TouchableOpacity>
  );
}- Add a
goBackbehavior onterms.tsx:
import { useRouter } from "expo-router";

function TermsScreen() {
  const router = useRouter();

  return (
    <Button title="Go Back" onPress={() => router.back()} />
  );
}- On the
TermsScreen, we have an issue with the double header, we can fix it with some options within the layout:
// app/_layout.tsx
<Stack screenOptions={{ headerShown: false }}>
  ...
</Stack>
Or configure specific screen options:
// app/_layout.tsx
<Stack.Screen
  name="terms"
  options={{
    headerShown: true,
    title: "Terms & Conditions",
  }}
/>Expo Router automatically generates types for your routes. Enable typed routes in your app.json:
{
  "expo": {
    "experiments": {
      "typedRoutes": true
    }
  }
}
Now your routes are fully typed:
import { Link } from "expo-router";

// TypeScript will autocomplete and validate your routes
<Link href="/terms">Terms</Link>
<Link href="/starships">Starships</Link>- Enable typed routes in your project.
- Verify that TypeScript autocompletes your route paths.
You can organize routes using groups (folders with parentheses):
app/
  (auth)/
    _layout.tsx
    index.tsx      → /
    terms.tsx      → /terms
  (app)/
    _layout.tsx
    starships.tsx  → /starships
- Create route groups to separate auth and app routes.